Our 9-Step Concrete Coating Installation Process
We’ve perfected a one-day process for concrete floor coating installations. Even though we offer quick turnarounds with minimal disruption to your operation, we do not cut corners on quality.

Concrete Coating Installation eXecuted to Perfection
Learn more about the process we use to prepare your floor for excellent results. While the same process can be used in residential and commercial spaces, the time may vary. Just a heads up, there’s a lot more vacuuming involved than you might think!
Let’s start at step 1…
Floor Prep
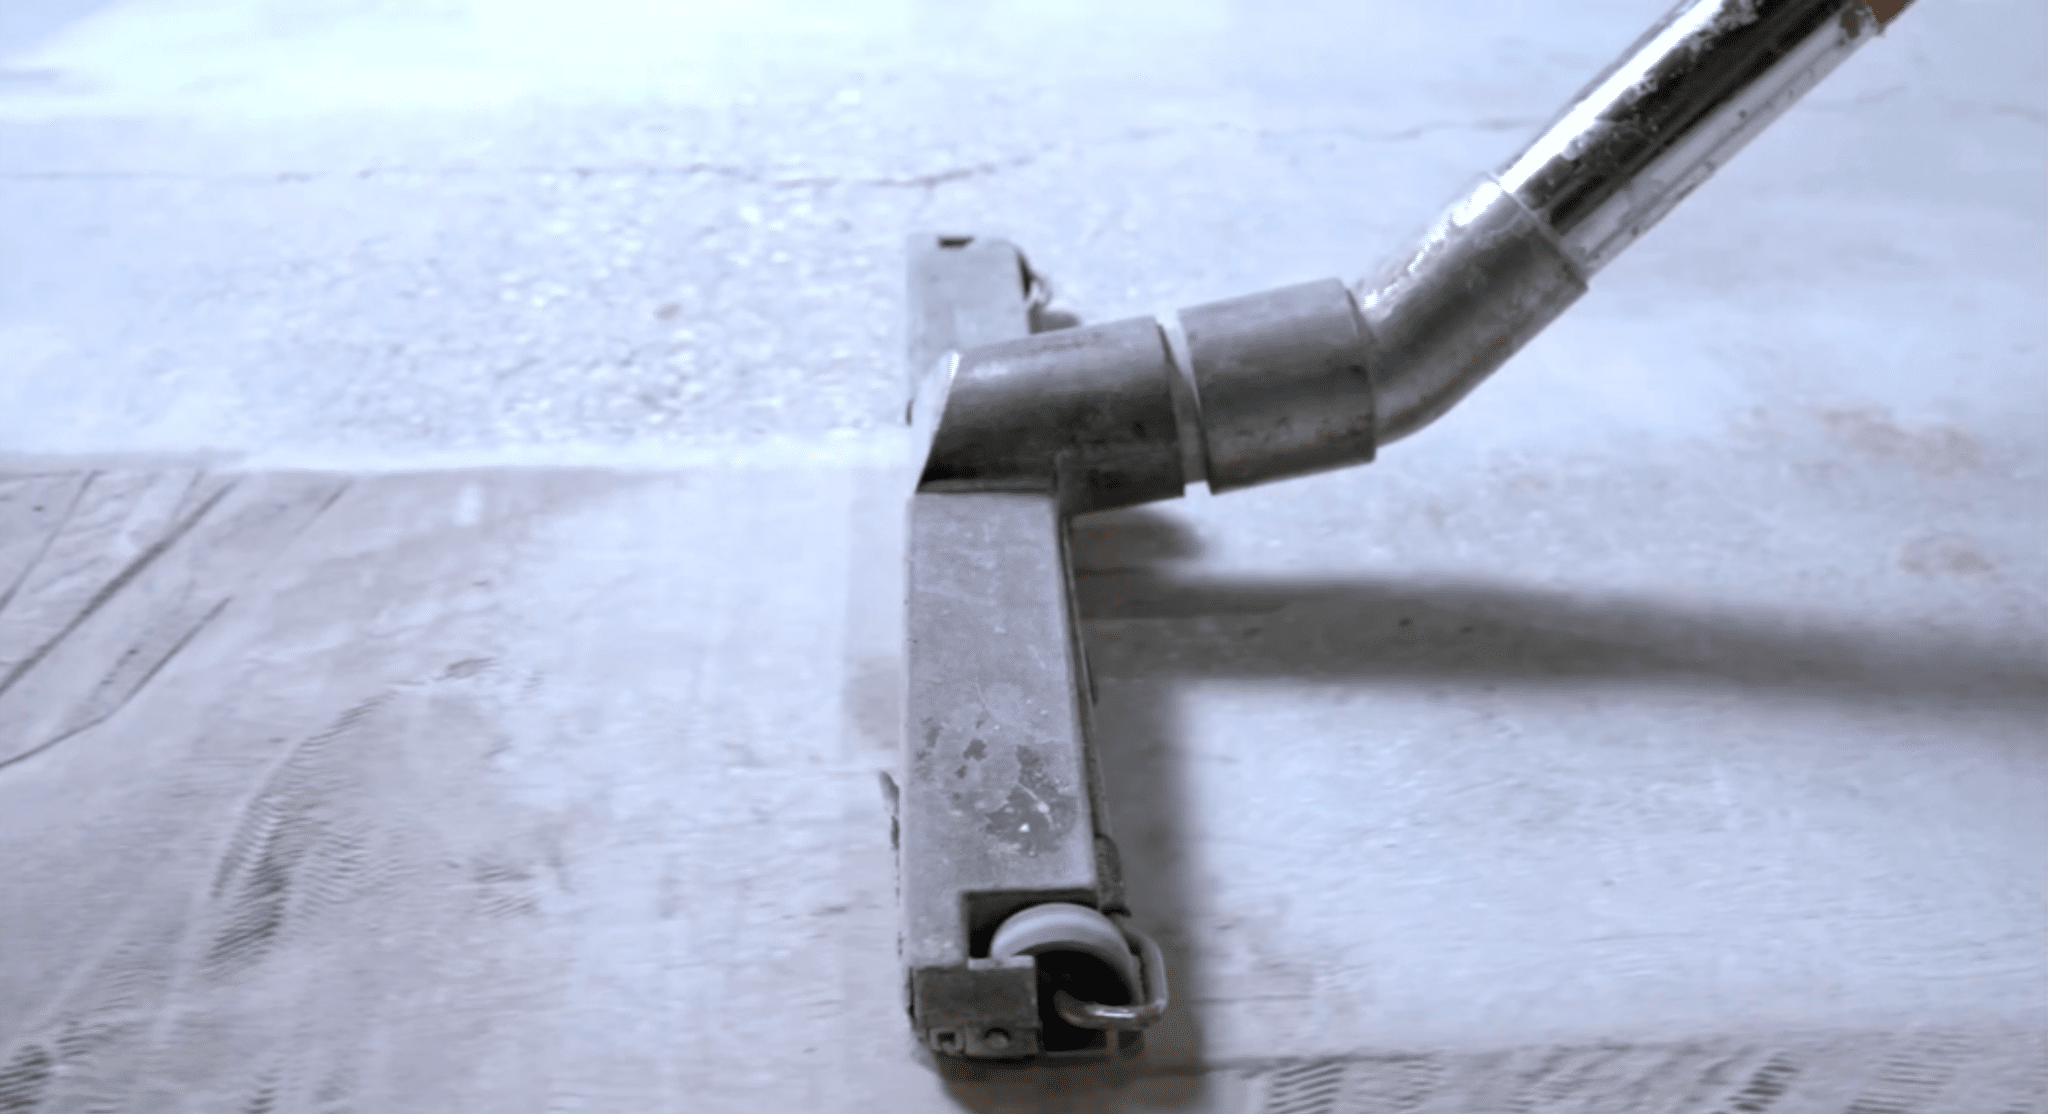
Step 1
Surface Prep (1-1½ Hours)
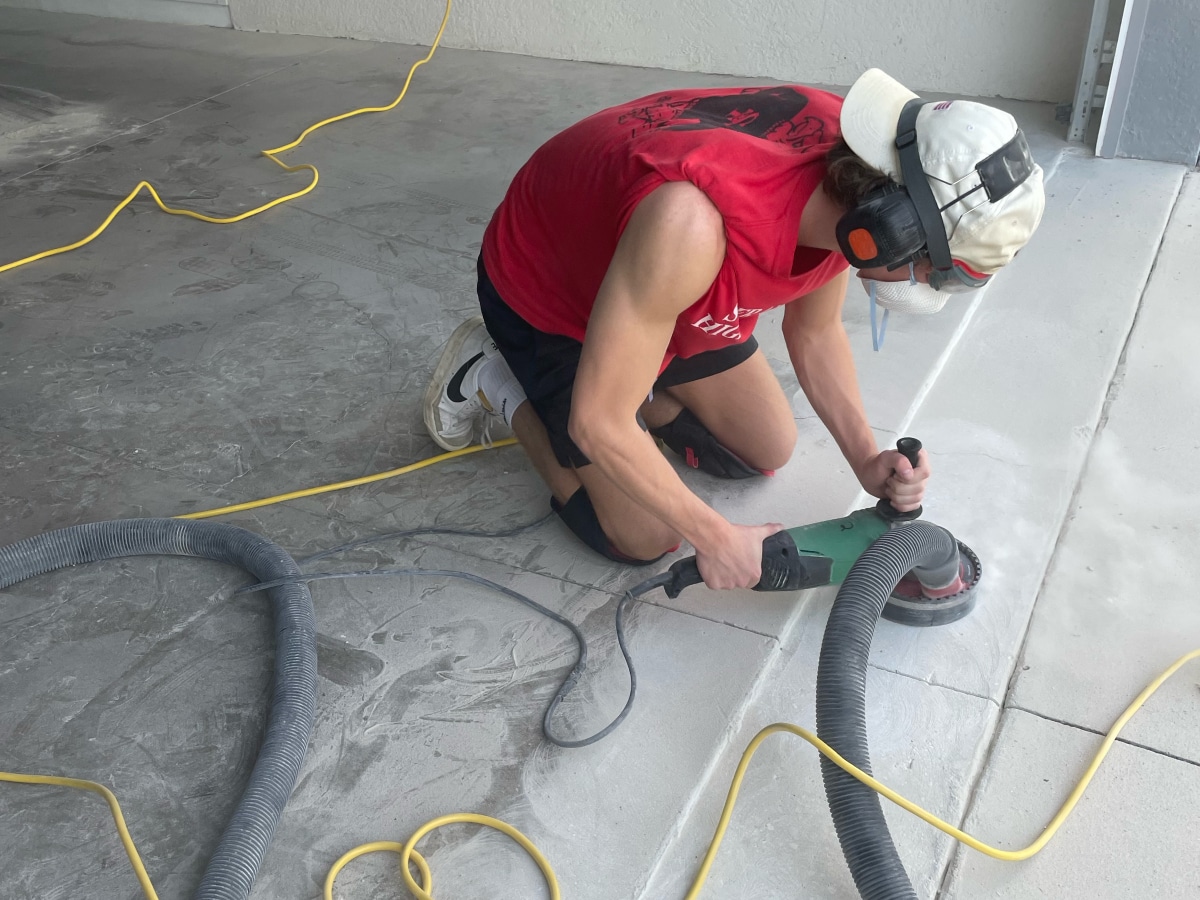
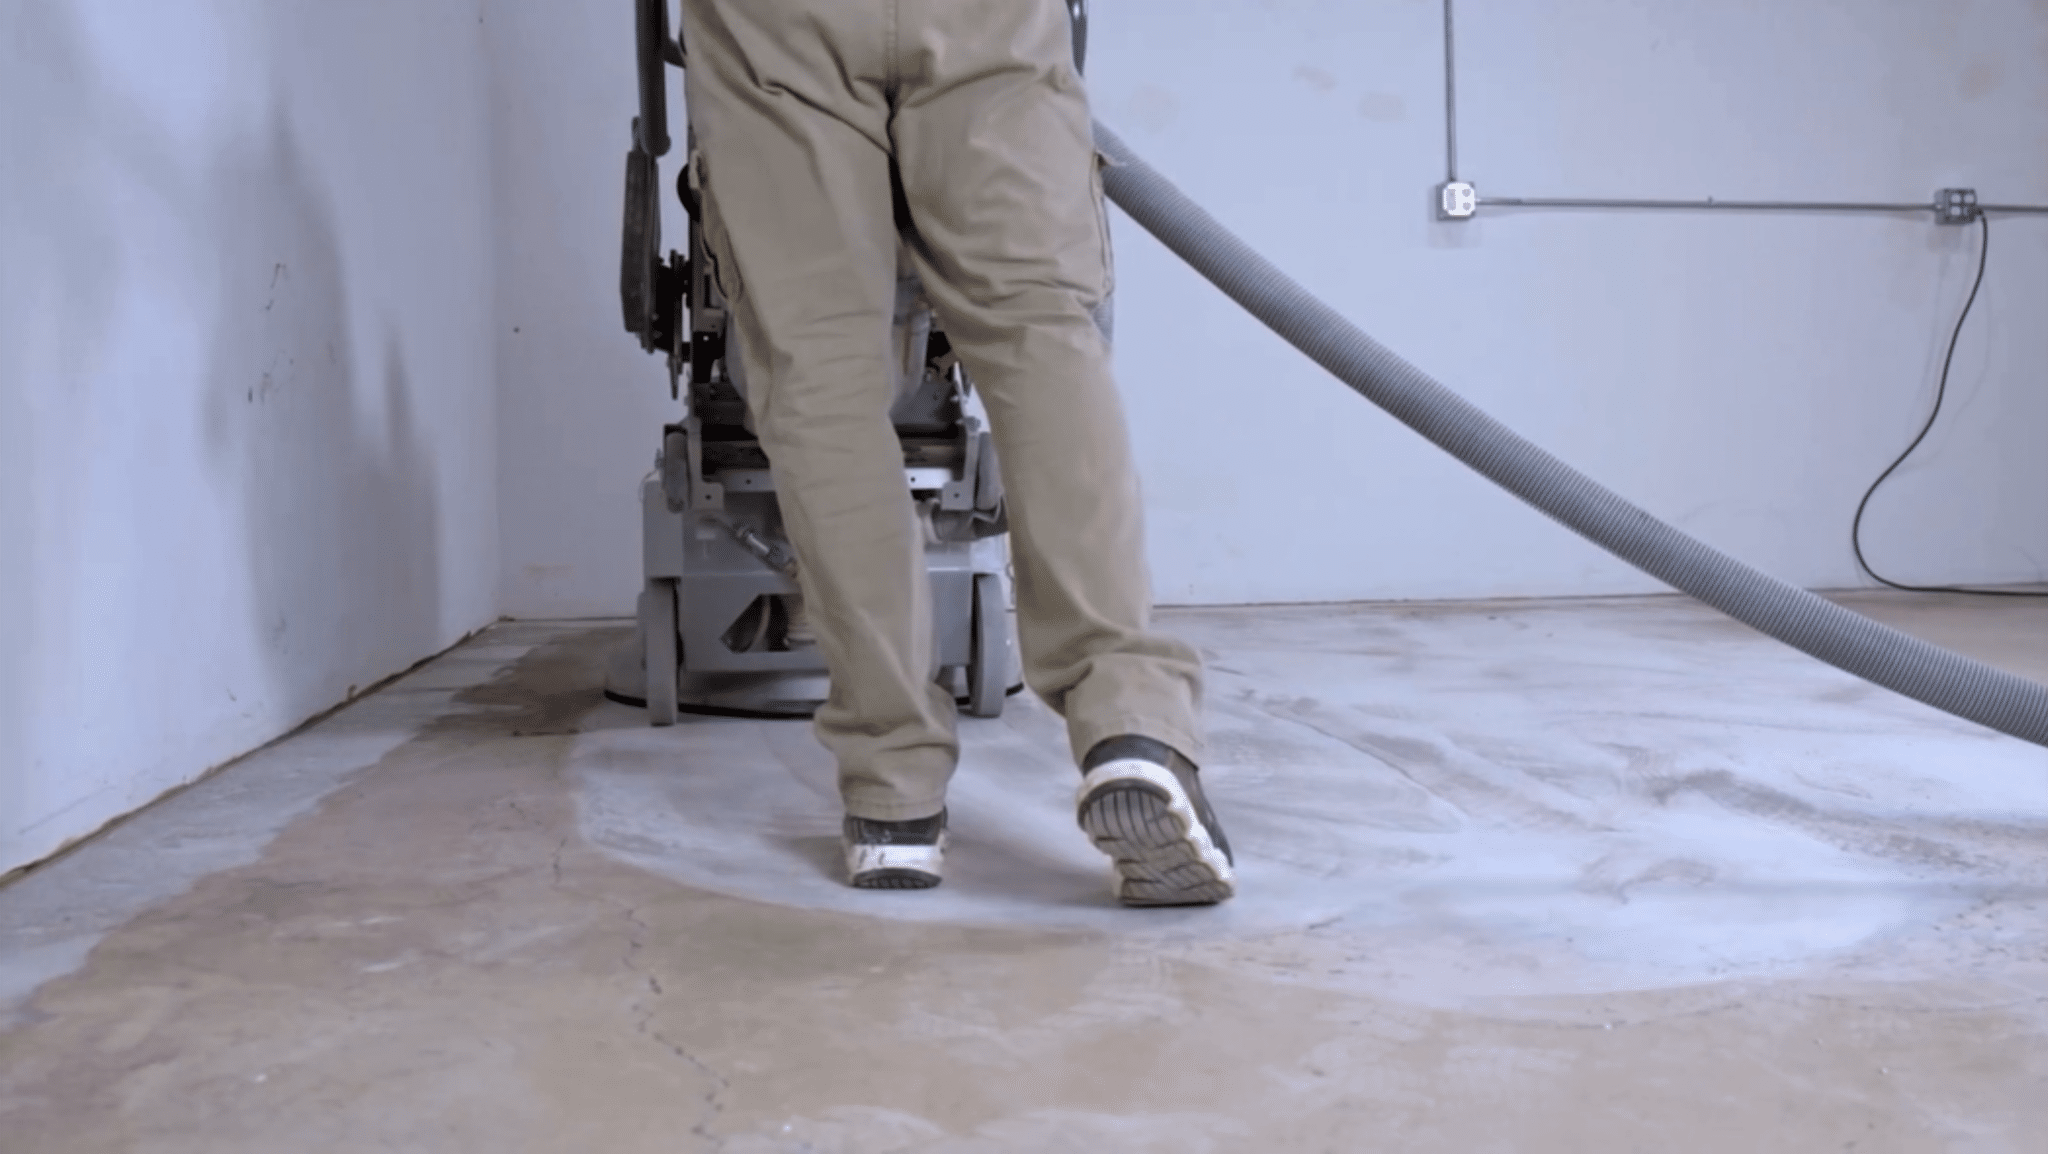
Preparation is the most important step in the concrete coating installation process. To ensure proper adhesion to the concrete we use state of the art Lavina Concrete Diamond grinding equipment and smaller hand tools with diamonds to grind edge to edge. The diamond abrasives remove the first latent layer of concrete along with any other “bond breakers” such as sealer, overlays, paint, etc. This step opens up the pores of the concrete and roughs it up to enable better adhesion as the coating wicks down into the concrete. This is how we are able to provide the 15 Year Warranty.
Step 2
Removal of Loose Concrete (½ Hour)
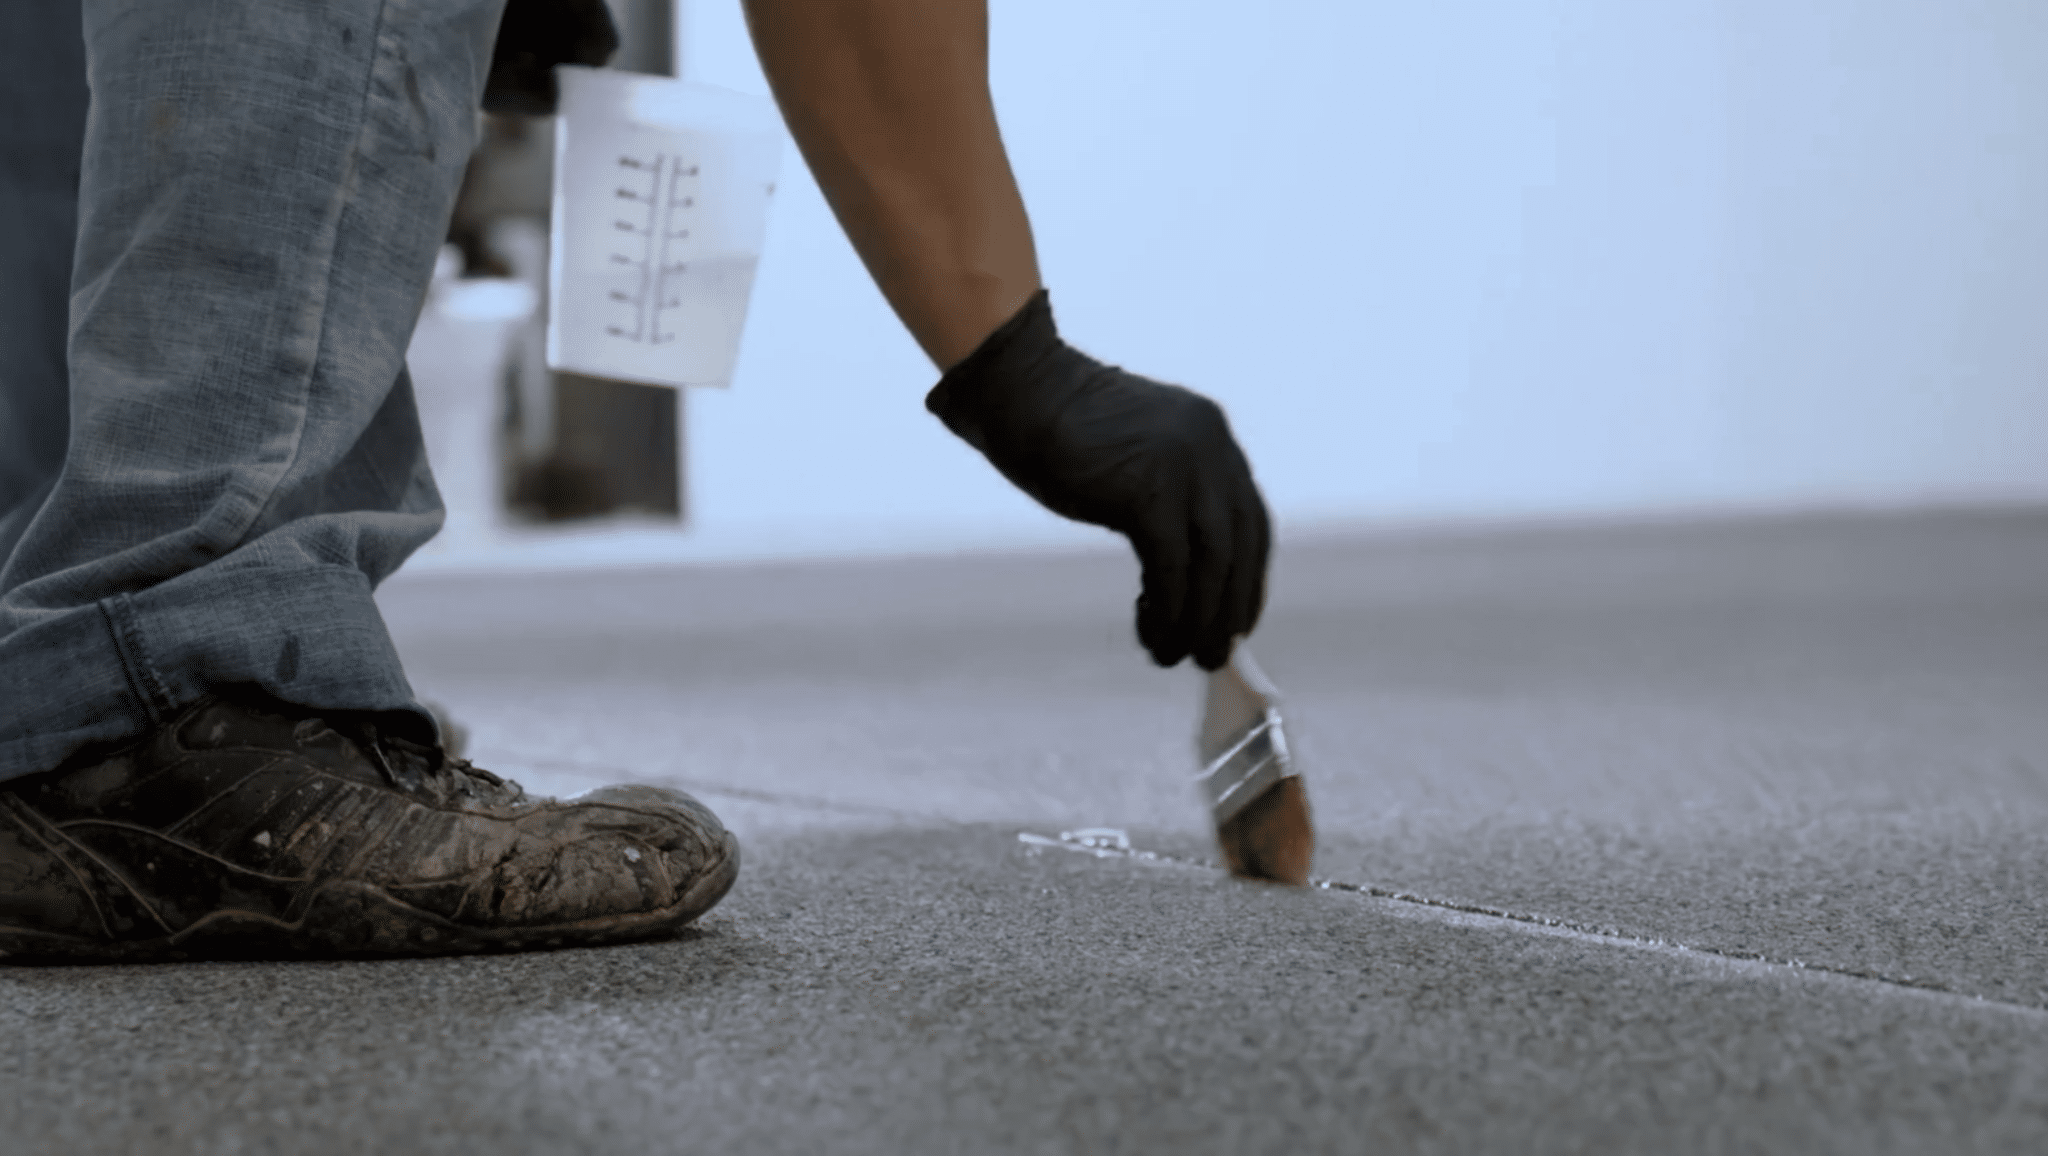
If there are any visible cracks in the concrete, we use a V-groove crack chaser with diamond saw blades to open up the crack, removing any loose concrete and abrading the crack sides for better adhesion.
Step 3
Vacuuming (15 Minutes)
We vacuum the entire floor to remove any loose silica dust not collected with our HEPA (high-efficiency particulate air) dust extractors.
Repair & Coat
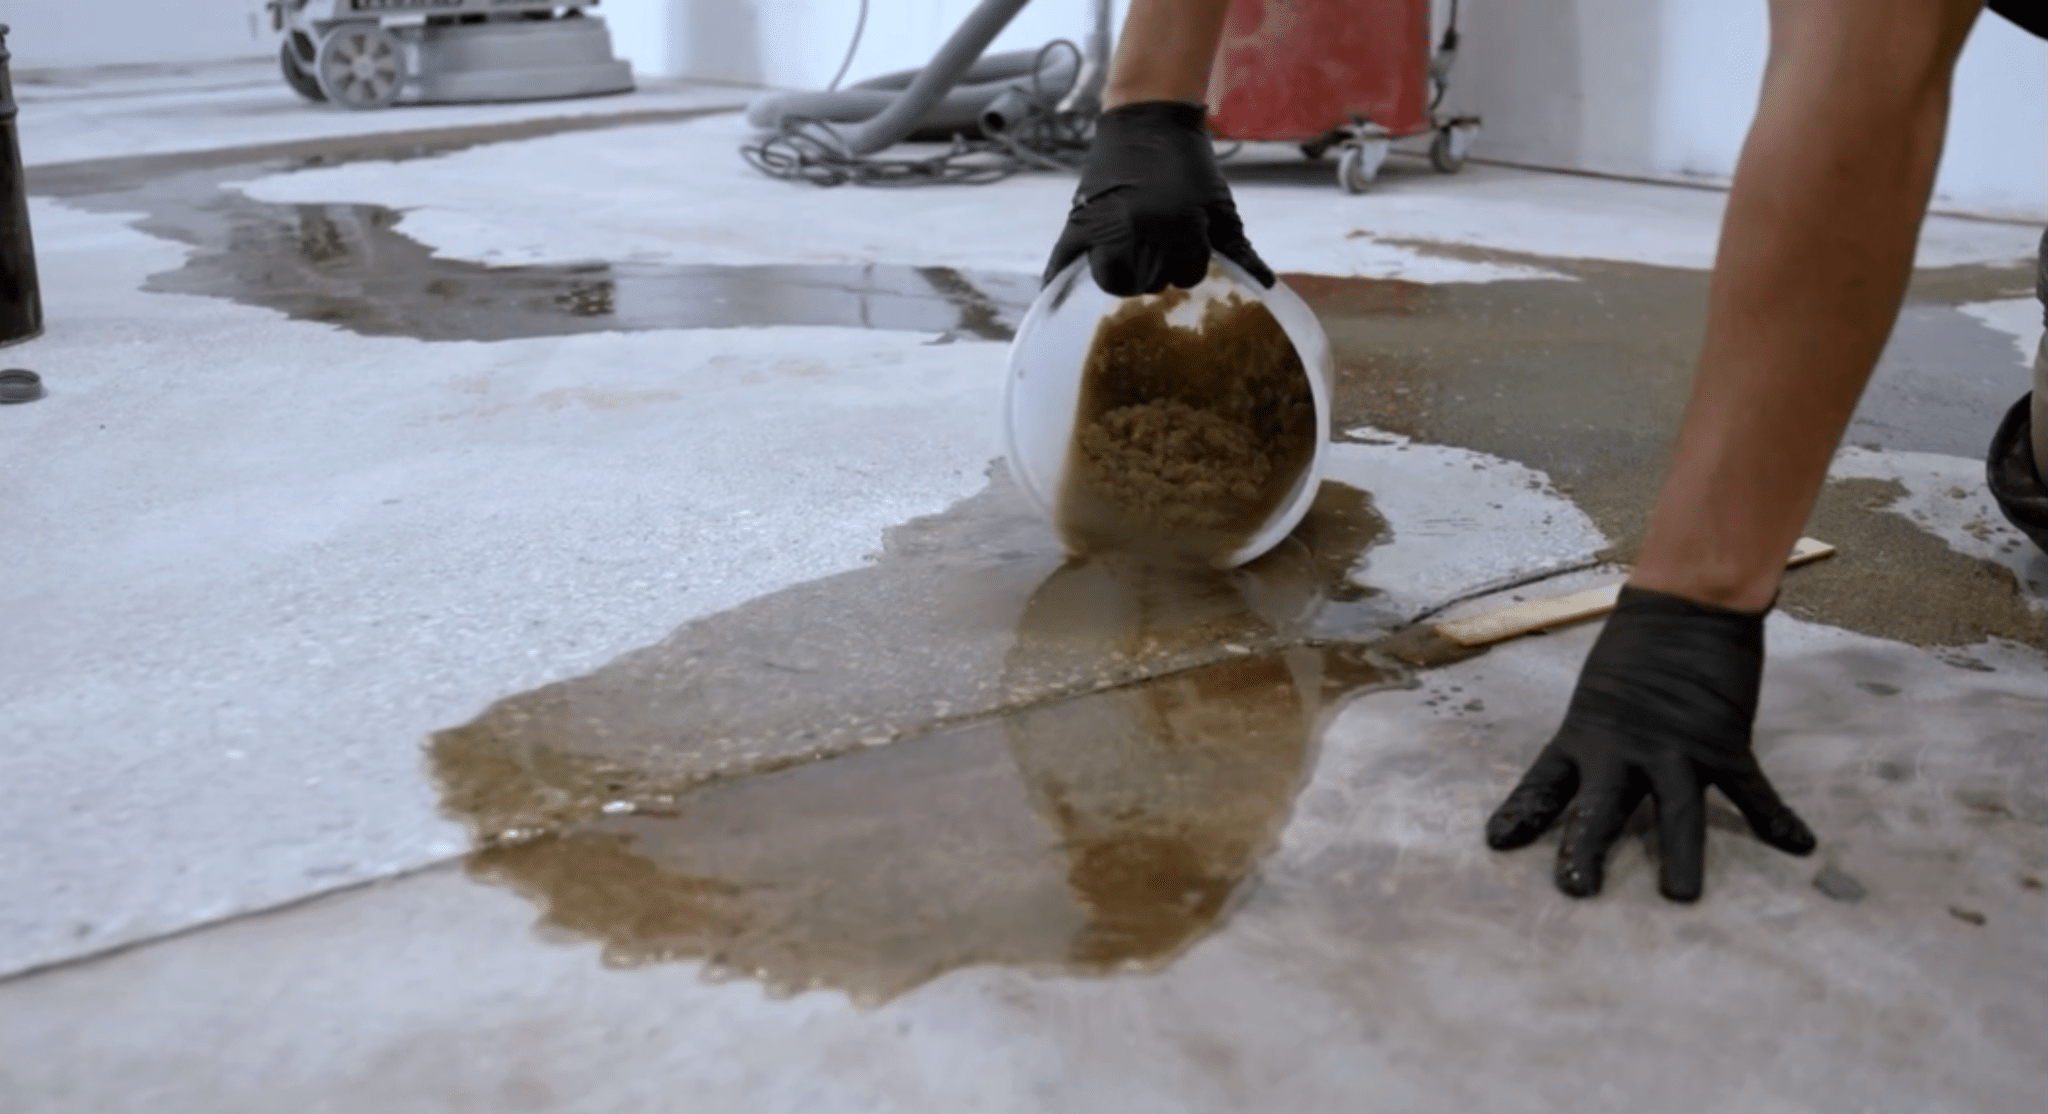
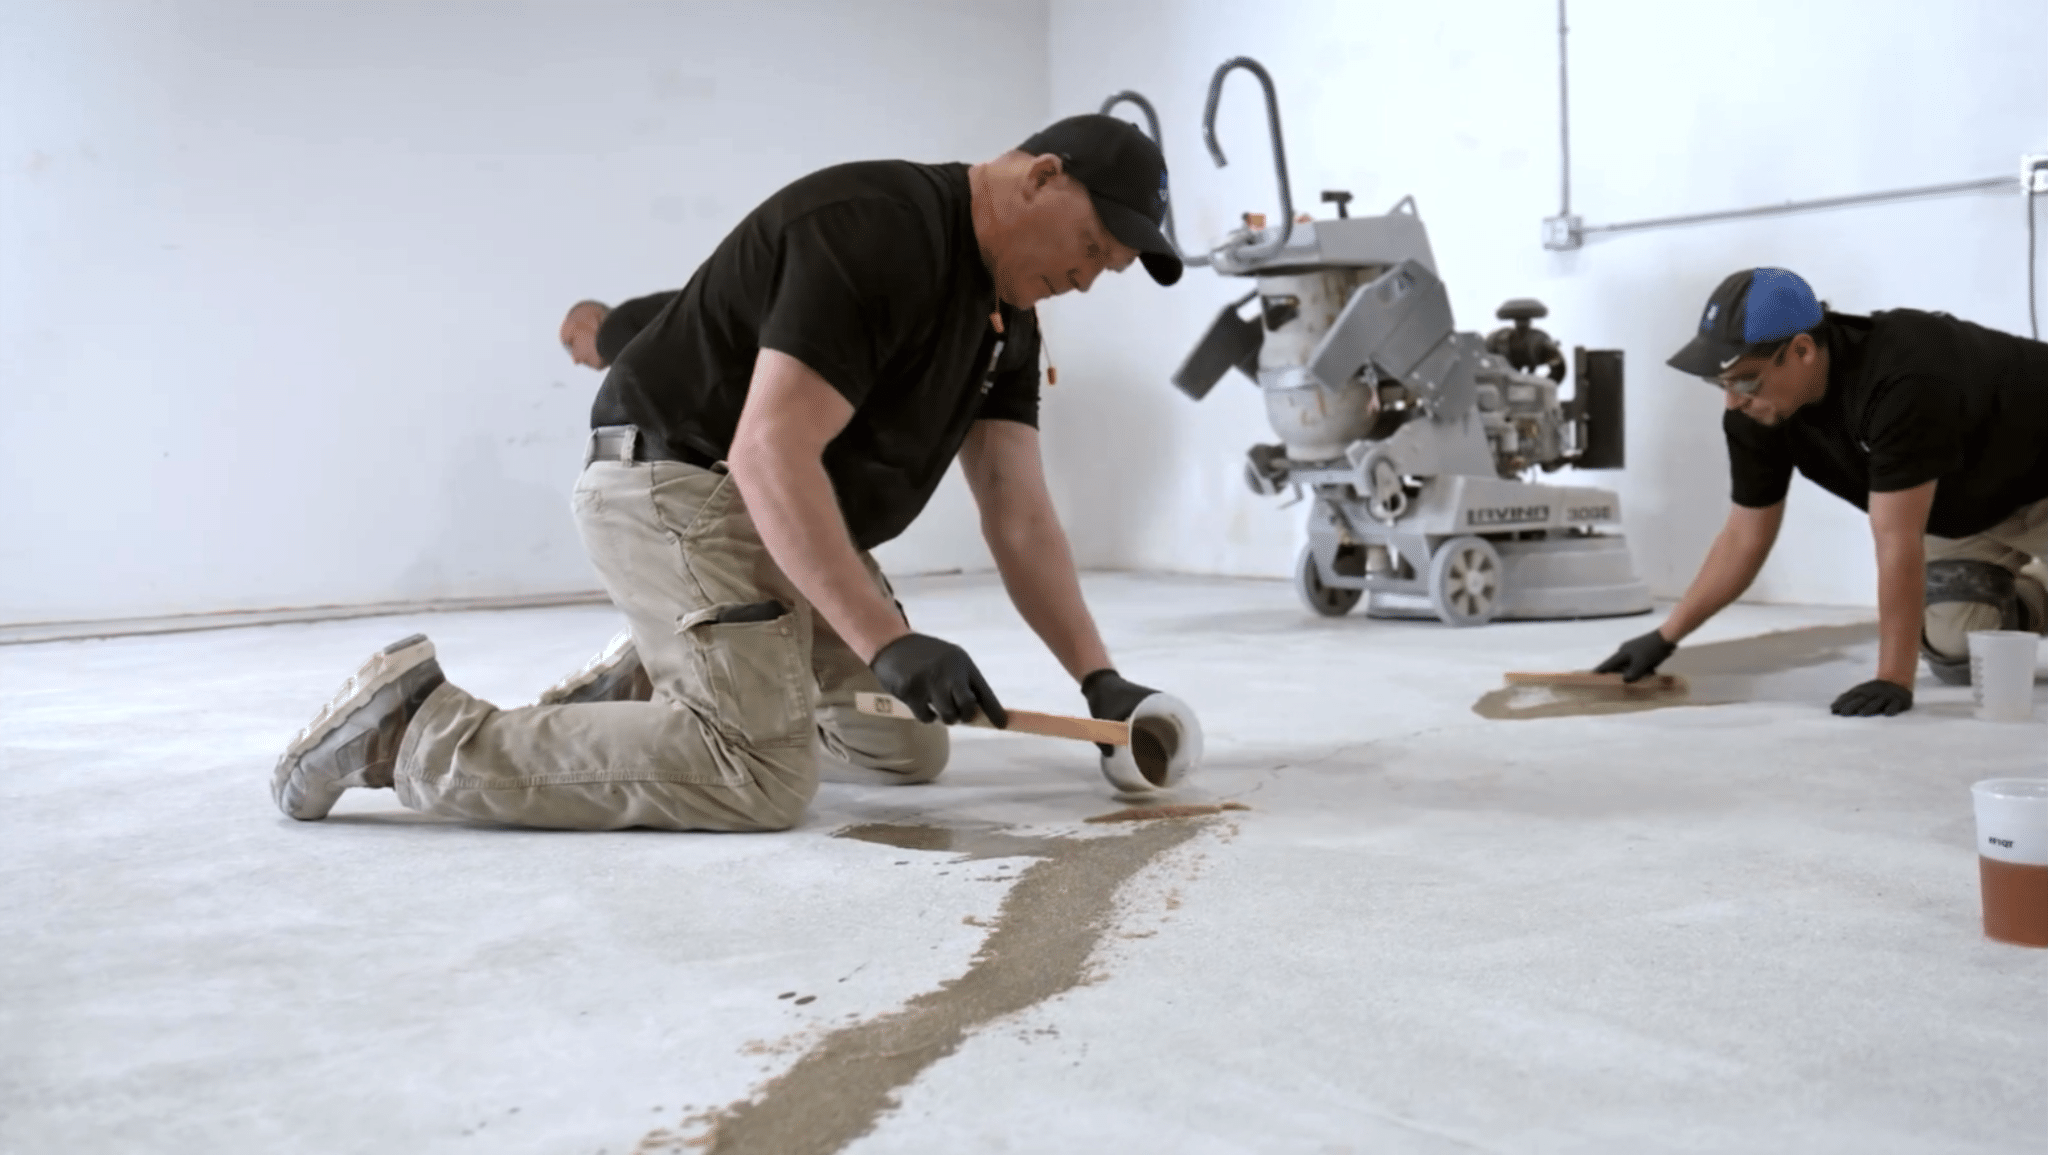
Step 4
Repair & Restoration (1-1½ Hours)
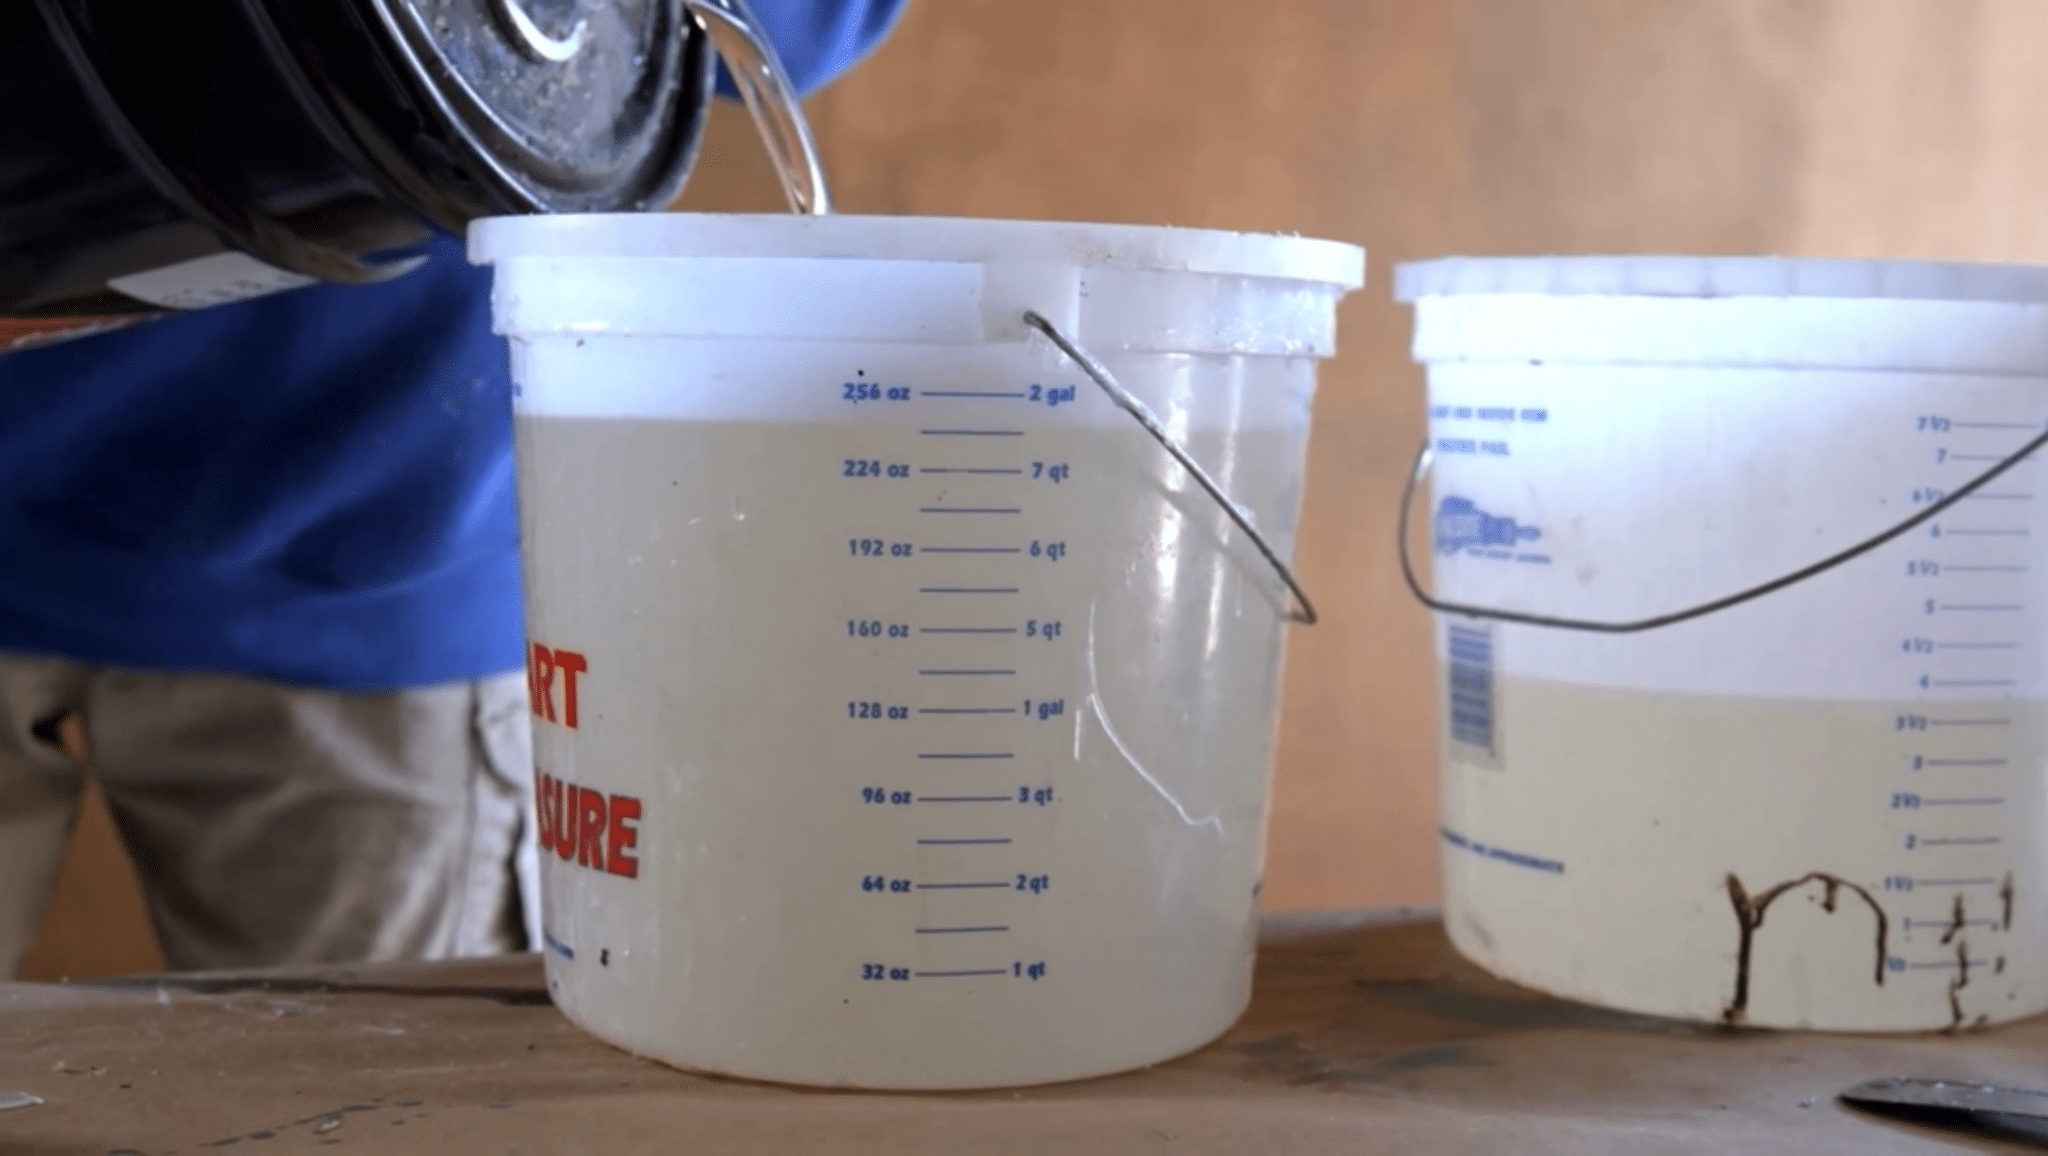
Next, we repair cracks and pits in the damaged concrete, applying our two-component low-viscosity polyurea rapid fix. This material can be applied in cracks and pitted areas to build them up until they’re even with the concrete grade. It can also be used as a parging compound for verticals and rebuilding control joints (if needed). After application, we typically wait 30-45 minutes for it to harden. We then re-grind those isolated areas to smooth out the floor and scratch the material to ensure proper adhesion.
Step 5
Base Coat (1-1¼ Hours)
Next, we apply a 100% solids polyurea polyaspartic material that has two components and is tinted either gray or tan. It’s used as a primer at approximately 5-6 mils (DFT – Dry Film Thickness) to achieve superior adhesion to the open, porous concrete.
Step 6
Broadcast Color Flakes (1-1¼ Hours)
We hand-broadcast color flakes while the base coat is applied. We primarily use a ¼” color flake blend, which gets broadcasted to rejection. (Ding, ding, ding … it’s lunchtime for our installation crew!)
Topcoat & Finishing Touches
Step 7
Reclaim Loose Flakes & Scrape (30-45 Minutes)
Any color flake that doesn’t adhere to the base coat will be reclaimed and reused on future jobs. As a final step, the floor will be scraped very aggressively to take down any high spots or sharp points. We will then vacuum the floor again. (If you know our wives, please don’t tell them we vacuum this much!)
Step 8
Topcoat (1-1¼ Hours)
Next, we apply our 93% Solids Two-Component Polyaspartic material. All vertical surfaces, steps, edges, and joints are treated with chip brushes and 4” rollers first. Secondly, the main field areas will be coated using a squeegee and back-roll method to ensure full encapsulation of the chip and an even finish. This is your protective layer. It is resistant to road salt, chemicals from your car, and extremely abrasion and stain-resistant. We add a non-skid additive in this step on all floors to achieve a non-skid, slip-resistant floor.
Step 9
Clean-Up (Varies)
Finally, we’re ready to clean up and tear down the set-up. Caution tape is rolled in front of the area, and we’ll review instructions for return-to-use. Once we collect the final payment and accept a fist bump, handshake, high five, chest bump, hug, or kiss (we’ve received them all), all that’s left is for you to enjoy your new polyaspartic-coated floor!